Tag Archives: leather

MIP built, some nice trim added to the glare-shield and LCD screens ready!

Only spent a few hours on the cockpit today but things are moving along nicely, today I mainly relocated the painted MIP frame into my spare bedroom of where the cockpit will mainly be developed over winter as next year I’ll be looking to build a dedicated brick building for it in the garden.

So today to quickly summarise before I go into detail and post up some photo’s these are the main things that I achieved today:-

  • Constructed the MIP stand in the spare bedroom.
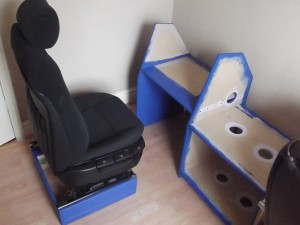
  • Mounted the seat on the newly constructed and painted seat stand.
  • Covered my glare-shield cover in faux leather.
  • Dismantled some monitors ready for the MIP panels.

I have been having withdrawal symptoms from not flying online recently so I did a couple of flights today (EGSS -EGAA) but afterwards I cleared out my spare room (what was my home-office) bought in the panels from the shed and using some newly acquired dry lining screws (black in colour) I then screwed the MIP frame together –  this is the first time since painting the panels that I have screwed it all together and I was really impressed with how it looked and one the MIP screen panels are mounted will look just fantastic! 🙂

The MIP frame constructed and seat fully mounted.

Next I went up into the loft and found the upper part of what is now my captain’s seat and then screwed and mounted the seat to the painted seat stand… things are now coming together nicely  – I have not yet re-located the centre pedestal from the shed into the house as yet as I’ll need the space when installing the new MIP panels, LCD screens, I/O hardware and electronics  for the MIP panels once they arrive – I’m hoping that the MIP panels, landing gear level and the other MIP panel’s will turn up this coming week so I can sort out the entire MIP next weekend as I’m now at a stage where I have done as much as I can until I get some more of my bits that I have ordered.

As I knew I was planning on covering the glare-sheild this weekend, I gave my mum a call during the week in the hope that she would have an upholstery stapler (a heavy duty staple gun) as being an artist she generally works with canvas and wooden frames and was happy to find that she did so that saved me spending yet more money and I was lucky enough to be able to borrow it…. So today came the time to cover the glare sheild sections in the faux leather to make it look like how the real aircraft does and I was extremely happy with the results.
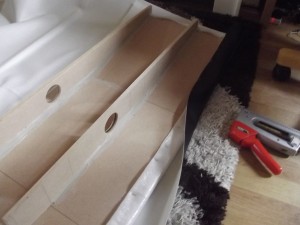
Applying the Faux Leather over a layer of foam sheet to give a slight cushion effect to the glare-shield.

Since I first started building my Mk.1 cockpit I had been saving some sheet foam type of cloth which I finally managed to use by layering underneath the top glare-shield cover to give a padded feeling, see the photo on the right of how I achieved this by first stapling the foam layer and then applying the leather over the top… the end result is extremely authentic!

LCD screens removed and now bezel-less and ready for mounting into the MIP section.

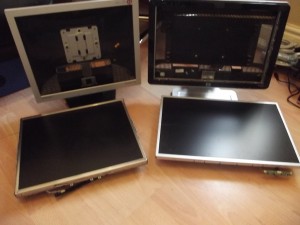
Now that I had run out of staples and was unable to start the upper padded pedestal rim (that should be covered with faux leather too) I decided to take appart a couple of LCD monitors which I will be using inside my MIP frame (1x 17inch LCD monitor and 1x 19inch widescreen) I was surprised just how easy it was to remove the bezels and outer monitor housing – I’m now just waiting for the MIP monitor panels to arrieve so I can then ensure that when I mount the LCD screen’s they are in the required positions.

Plans for tomorrow then… I should probably spend the morning with the children (my two girls, Molly and Ruby) maybe take them to the park for a couple of hours if the weather is nice as I’ve neglected them a little the last couple of weekends! – Tomorrow afternoon though I’ll more than likely do another flight and then wire up my custom upper centre pedestal panel to a BBI-32 card and the USBOutputs card and do a video explaining how I utilise the USBOutputs card the BBI-32 as I know a friend of mine (Joerg) is interested in how the USBOutputs card works with the Wilco, so I’ll be demonstrating that 🙂
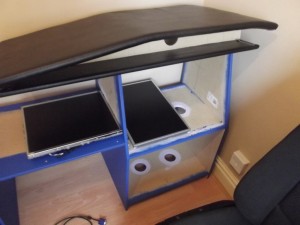
My achievement today.. Two bezel-less screens, MIP constructed and the glare-shield covered with faux leather!

So at the end of today this is what the MIP and glare-shield looks like – be aware that this is not where the actual MIP will be placed, this is just a temporary place so I can work on it over winter before moving to a larger room/building that I have planned for the back garden.

More updates tomorrow evening hopefully! – Thanks for reading! 🙂
Paint and materials arrived and a busy day with more panel priming and seat box building

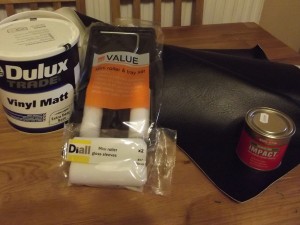
During the week the faux leather turned up which I mentioned about ordering in my previous blog post and for £14 from eBay I was well impressed… I now have a 200cm (2m) by 131cm (1.3m) cut of fire resistant faux leather of which I will be using to cover my glare shield with, top-part of my side-stick pedestal and of-course the rim around the top of the centre pedestal… hopefully it will do the job and make the cockpit look great!

All the bits and pieces ready to go..

On my lunch break at work yesterday I took a trip across town to B&Q and purchased a small roller set for a couple of pounds, two extra foam roller head’s (I plan on using one for each coat in case they go funny after each coat – when they dry out etc.), some Evostick IMPACT glue which I will use to stick the faux leather to the MDF and of-course the specially mixed Airbus structural paint colour (RAL5017 in a Matt Emulsion finish) – In total the bits that I purchased from B&Q yesterday cost me £32 which I cannot really complain at 🙂

All sanded down and smooth… ready for its second coat of primer.

After applying the first coat of primer (Spare emulsion that I had in the shed) to my MDF panels and the pedestal last weekend, I was keen to wake up early this morning and get out in the garden to sand down the panels ready for their second coat of primer.

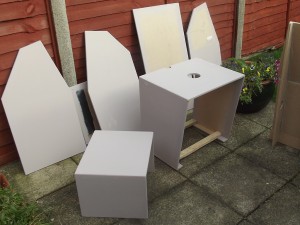
I was lucky with the weather and all day it remained generally sunny so I was able to fully apply the second coats of primer to all the panels including pedestals sections and then they all dried happily in the sun allowing me to the start on the seat box of which I would mount my BMW seat on top of…

Primed panels and pedestal sections drying nicely in the sun!

So having found some 2×4 timber in the shed and doing some research online (watching a few YouTube video’s of Airbus cockpits) I soon came to the decision that using one length on its side and one laying down raised the seat adequately – The seat I am using has some fancy controls on the side also allowing me to lower or raise the seat within a range of about 100mm (10cm) which is also pretty cool so I have some room at-least of errors 😉

So once I was happy with the general height of the seat – I worked this out mainly by comparing my seating position (my knee location against the upper pedestal compared to that of the first officers in this YouTube video) I then attached the seat runners to the wood with two large woodscrews and two pieces of cut out aluminium plate that I used as a washer for the rear holes as the woodscrew’s head passed through the rear holes.

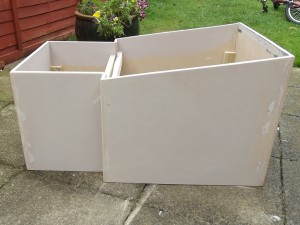
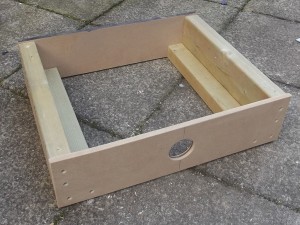
The new seat-box/raiser unit in its raw, unpainted form…

Once mounted, the seat was very stable and I then screwed the lower piece of 4×2 on its flat side to the upper piece of 4×2 which the seat was mounted to, to strengthen up the two runners I then used some 12mm MDF cut to size (140mm high by 540mm wide) and then screwed across the two new raiser blocks to create a box like structure.

As you can see from the image, I also used a hole cutting drill piece to drill a hole in the front of the seat box in case I later wanted to install some foot well lighting or had  a need to feed some cables through.

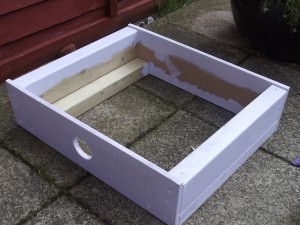
Now that the seat-box/stand was ready to be primed I found another tin of surplus emulsion from the shed (as I had used up the other tin on the panels and pedestals earlier today) and then primed that too and is now drying in the garden as we speak (well as I type this blog entry!)… Once its dry I’ll pop out and just pop some wood filler in the counter sunk wood screws so that hopefully tomorrow when I get back on with the project I’ll be able to sand it down and have a full smooth surface ready for the second coat of primer.

Seat box in with it’s first coat of primer on

So as its getting on now and I’m due to head off out this evening I’ll be calling it a night until tomorrow morning, where and when hopefully it will be nice weather again all day and I can then get on with the bits and pieces that I hope to achieve tomorrow which are:-

  • Sand down and apply second primer layer to the seat-box/stand.
  • Lightly sand down all the panels and the pedestal and apply the first coat of RAL 5017 (…exciting!)
  • Start work on the side-stick pedestal.

Fingers crossed the weather will be as good tomorrow 🙂


New MIP parts just been ordered and Faux leather on its way!

The last 24 hours I’ve been thinking seriously about how I can achieve a really well finished MIP including the landing gear, auto-brake panel etc. I decided that it was time to go and order some bits from Marcin over at Skalarki (again)

I’ve just purchased the following items of which I should hopefully receive very soon seems as the MIP and pedestal is coming along really well I’ll soon need to add the MIP panels on to the framework.

  • A320 CS MIP Panels
  • A320 Landing gear panel & leaver
  • A320 Auto-brake panel
  • A320 CS Loud speaker panel.

I’ve also just purchased some faux leather on eBay this evening, expecting it to be here by Wednesday so I should now have everything I need to finish off the MIP stand, side-stick stand and pedestal (minus the top coat of paint which I plain to sort out at the weekend).