I’ve been rather busy recently so have not done much else on the cockpit but to be honest even if I hadn’t have been busy I wouldn’t have been able to do all that much anyway as the weather in England has been pretty drab the last four weeks meaning that I wouldn’t have been able to get out in the garden to cut and work on the remaining bits of my centre pedestal and a few other bits and peices.
Earlier this week however I did a clean FSX build on my main flight simulator PC as I wanted to incorporate all my latest software and ensure that both of my graphics cards are installed and configured as part of the build. Well it took a couple of days of solid work to install a fresh copy of Windows 7 Professional (64bit), configure FSX, tweak it and install all my various scenery add-ons etc. I have literally just finished taking a full system image of both of my HDD’s using Acronis TrueImage 2012 (my main machine is running 1x 500GB 7200RPM mechanical HDD for Windows and a single 128GB SSD for FSX and all my add-ons) .
I’ve also been very interested in looking into merging the Wilco Airbus with the Project Airbus model for various reasons… firstly is that most people know that the Wilco external model is rather rubbish when compared with the Project Airbus model, another really cool feature of the Project Airbus model is the Wing flex! – I successfully merged my Wilco with the Project Airbus model and have now included this as part of the build and is the aircraft I will be flying in my flight sim!
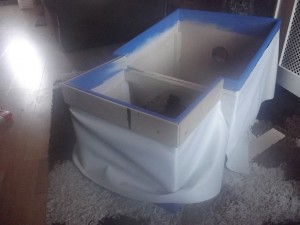
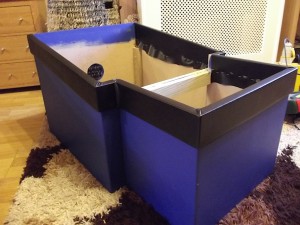
So this afternoon, it was surprisingly nice and sunny (despite being still rather chilly outside) so I decided to make the most of it and as I’ve borrowed my mums upholstery stapler I thought I’d add the leather trim and edging to the centre pedestal the results of which look pretty good in my opinion 🙂
So first of all I started off by cutting some 6mm MDF that I had left over and was surplus to requirements, the 6mm MDF was actually a perfect width for what I needed and now that the pedestal leather trim has been added looks great!
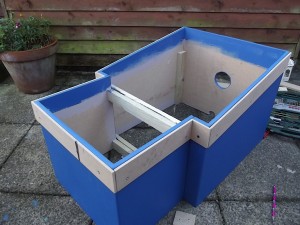
So taking measurements from the Simpit.de website, I found that the height of the pedestal rim was 7cm, so I cut a 7cm rim for the entire pedestal and then using 1.0 inch wood screws initally screwed them into the pedestal as a ‘dry run’ as shown in the photo on the left.

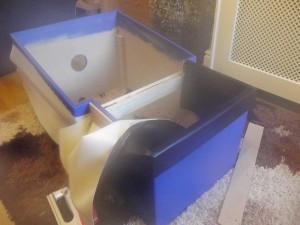
Showing the faux leather stapled to the pedestal and then the wooden rim screwed back in over the top.
I figured that to make a decent job of it I need to securly attach the leather to the pedestal and then wrap it around the pedestal rim and then strech and staple down on the inside of the pedestal.
I have not yet added the internal panel rails as yet but this will be the final bit to do to the pedestal but so far I am extremely happy with the results. I’ll aim to add the panel mounting rails in a few weeks time but obviously that is dependent on weather and my next order that will be arriving is for my MIP so I’ll be working hard on that before I need to do anything else on the centre pedestal.
It was rather tricky to then pull the leather back up and over the 6mm MDF but luckily the leather is stretchy and once I had worked the corners a bit it folded over nicely and I managed to staple it down and it started to really look good (in my opinion anyway).
More photo’s of today can be found over at my Photo’s section.
Some more good news…. apparently I should be recieving my first order (being the MIP panels and hardware) this week so I should then have some more photos and blog updates very soon! – I can’t wait to get the MIP panels all fastened to the MIP frame and the hardware connected to my I/O.
Stay tuned… more updates very soon 🙂


